Mailing Letter Rates using Direct Mail Automation
How to Use the Notice 67 Automation Template
Mailing letter-rate pieces that follow automation standards can be challenging without the right requirements. Fortunately, the USPS® provides several articles and guidelines to assist with this process. However, these resources do not go into great detail about the Notice 67 tool or explain how to use it effectively.
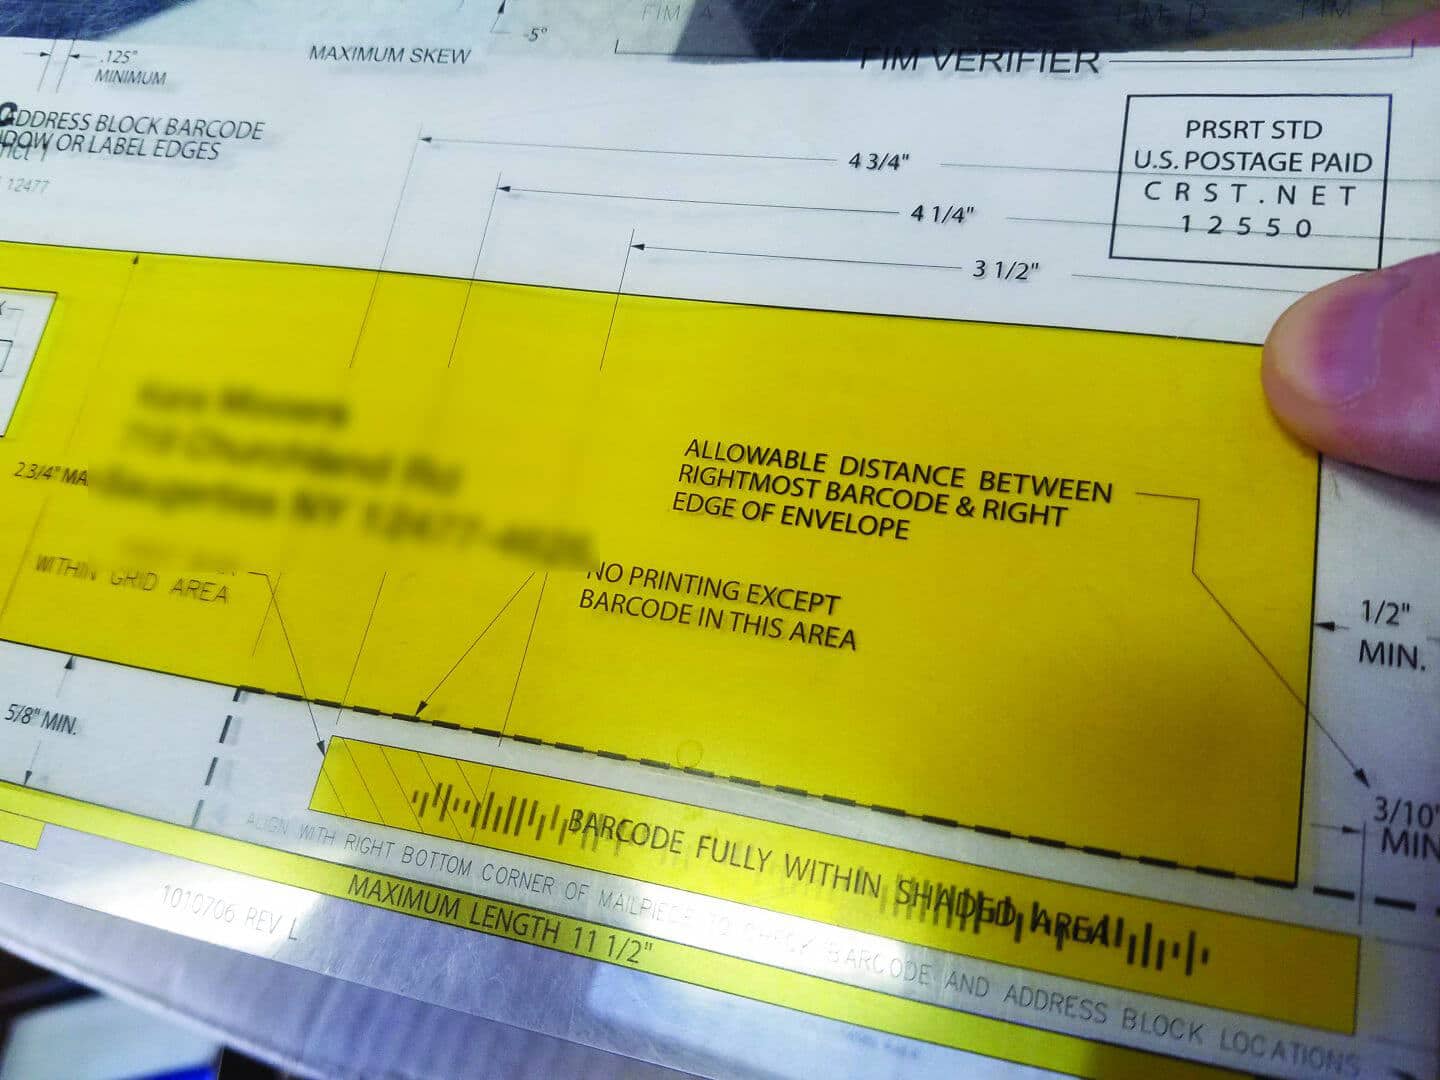
The USPS® designed the “Notice 67” as a plastic tool specifically for direct mailers, mailrooms, graphic designers, and printers. TThis tool ensures that professionals design, print, and mail pieces—primarily letters and envelopes—while fully complying with USPS automation handling standards. Essentially, Notice 67 serves as a clear plastic overlay that simplifies address placement. Additionally, it identifies the barcode clear zone and marks the correct positioning for Facing Identification Marks (FIM) patterns.
If you work in the mailing industry, obtaining a Notice 67 is highly recommended. However, always make sure you have the most recent version, which was last updated in April 2013. To acquire one, simply contact your regional Business Mail Entry Office. You can locate the nearest office using the USPS® Locator.
How to Apply the Notice 67 Tool for Mailing Letter Rates
Here is how we utilize the Notice 67 tool to ensure that mailing letter rates meet automation standards:
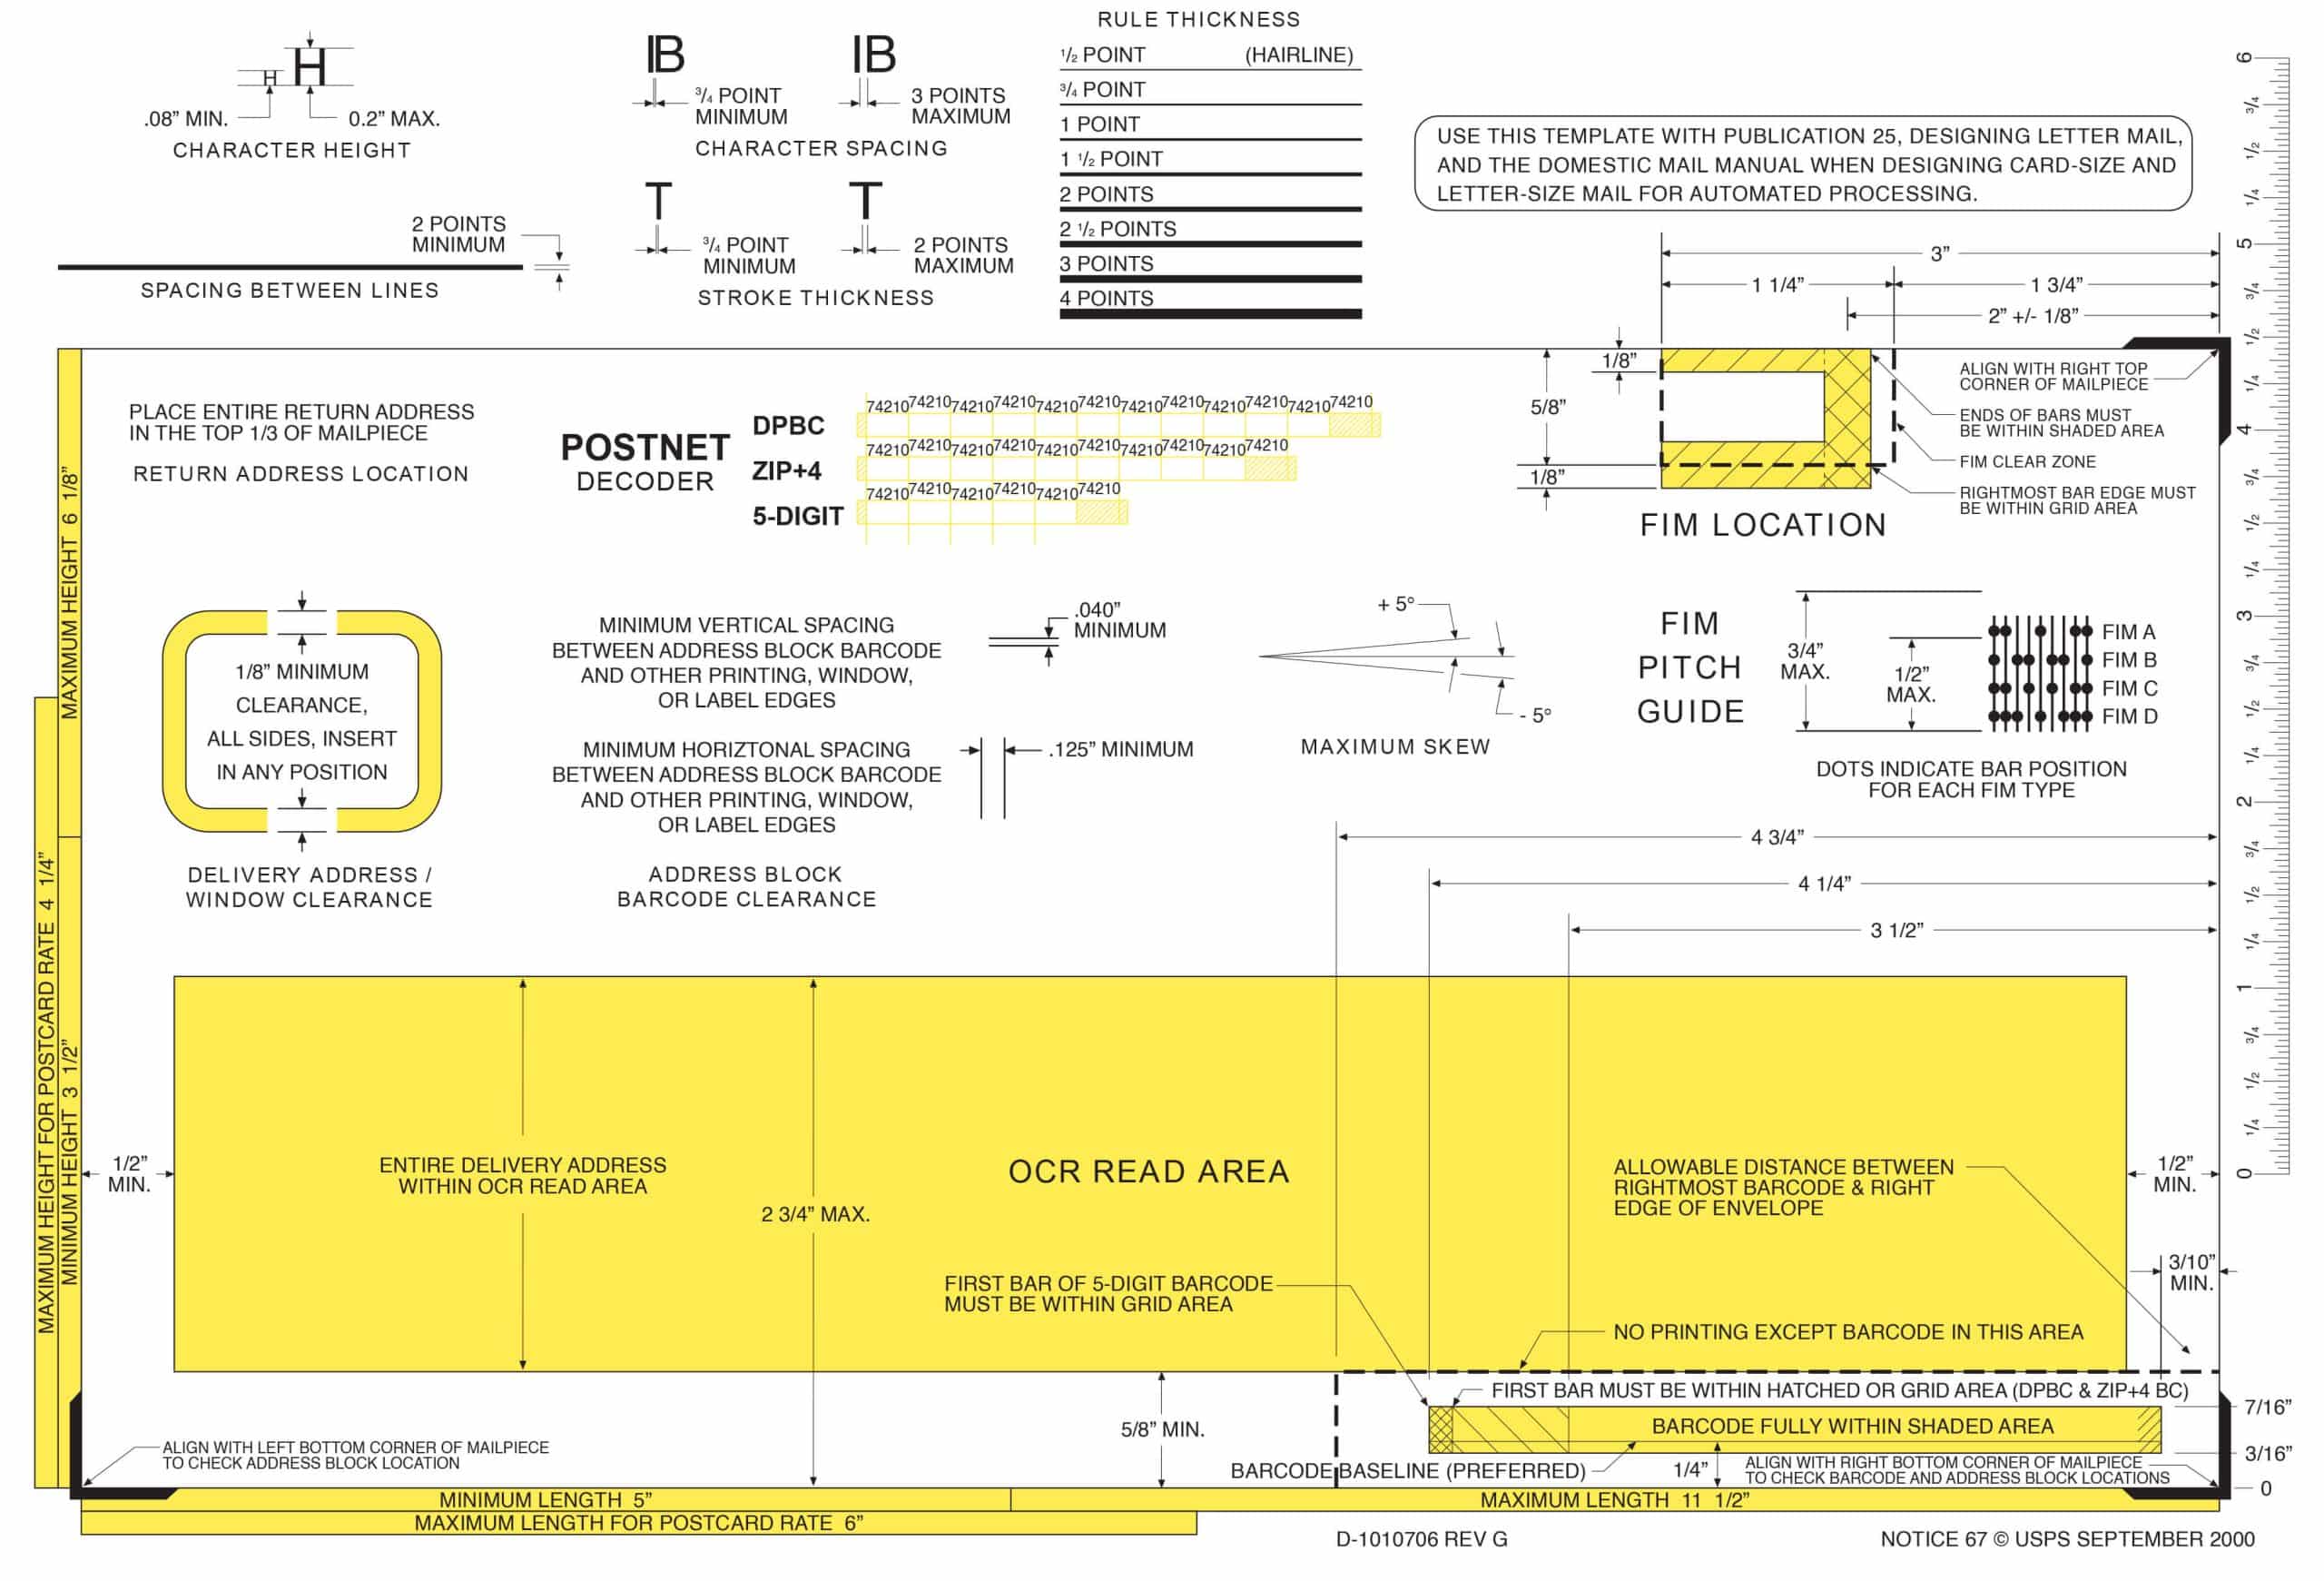
- Measuring Intelligent Mail® Barcode (IMb) Height and Length: The tool accurately gauges the height and length of the IMb. This ensures compliance with USPS specifications.
- Identifying Envelope FIMs (Facing Identification Marks): The template precisely locates FIM placement. In most cases, you will use the tool for FIM A or FIM C. For further details, refer to our postal definitions page.
- Measuring Envelope or Postcard Size: The maximum size for any letter-rate envelope is 6.125” x 11.5”, while the minimum allowable size is 3.5” x 5”. Postcards must not exceed 4.25” x 6”, with a minimum size of 3.5” x 5”. Additionally, you may want to use the Notice 3A Letter-Size Mail Dimensional Standards Template. This white plastic guide assists with height and length measurements. It also includes a cut-out slot to gauge the thickness of mail pieces.
- Placing the Address Block Within the OCR Read Area: The template highlights, in yellow, the designated area where the destination address should appear. Additionally, it includes two specific placement areas for the IMb. When opting for the IMb bottom-right placement, always double-check that the barcode starts within the hatched area.
- Positioning the Address Block in Window Envelopes: The tool makes it easy to see the minimum 1/8” clearance required around the address. Simply allowing the delivery address to show through the window does not suffice. Instead, there must be at least 0.125” of clearance surrounding the address block.
- Ensuring Proper Spacing Between the IMb and Address Block: The IMb should not be positioned closer than 0.040” or farther than 0.125” from the address. The template helps confirm compliance with this spacing requirement.
- Maintaining the 1/2” Buffer and 5/8” Distance from the Bottom Edge: Neither the IM barcode nor the address block should encroach on these restricted areas. The Notice 67 tool provides precise guidelines to maintain this spacing.
- Verifying Additional Minor Measurements: Beyond its primary functions, the tool also assists with minor measurements. It ensures compliance with character height, character spacing, stroke thickness, and rule thickness.
Finally, the USPS® strongly recommends using Notice 67 alongside Publication 25. This publication provides greater detail and extensive guidance on mail piece design. By following these standards, you can ensure seamless automation compliance while optimizing the effectiveness of your direct mail campaigns.
USPS NOTICE 67 TEMPLATE
September 2000
The Notice 67 tool is used to check if mailing letter rate pieces meet automation standards


